Technical Newsletter vol.2 : Quality control of µ-MIM : a focus on process capability
Quality control of µ-MIM : a focus on process capability
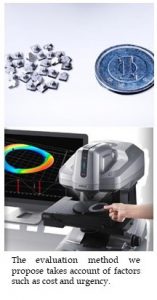
In our view, the “quality” of Japanese products remains one of the key stand-out factors when it comes to international competitiveness. Metal injection molding (MIM) is a form of processing that can efficiently handle medium- to large-scale production of hundreds of metal products using metal moulds, right up to mass production in an order exceeding hundreds of thousands. Developed μ-MIM operations often require the mass production of high-precision parts. Parts for medical equipment in particular, demand for which has soared in recent years, require even more stringent quality control. This is why we strive to address quality on an ongoing basis. One of the activities to manage the process capability index (the variation width of the quality characteristic value generated by the process) constitutes one criterion for determination. We accumulate data on the quality characteristics of each product, e.g. dimensions, physical properties and functionality etc. Since quality characteristics are often prominent during the processing, as required, high-resolution 3-dimensional optical measuring equipment, high-speed measuring equipment, etc. are used, or we conduct an inspection using an optical microscope / electron microscope.
Moreover, we may also inspect the internal condition of items using X-ray/CT scanners as necessary. While analyzing the data received, we also identify the technical factors behind the variation and do the necessary to maintain our high quality.

Pinpoint awareness and on-site attention to detail are what underpin the µ-MIM manufacturing process.

Careful judgment is particularly imperative when it comes to measurement results of fine, gap, hollow, and fitting regions, since measurement with conventional technology is not possible.
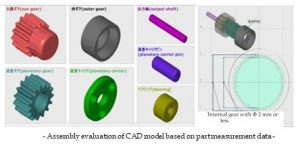
Alternatively, if there is no significant difference in the measured values between our own measuring machine and the one you have installed, solving this issue at an early stage is what paves the way for a smooth mass production launch. Our own measuring set-up includes a 3-dimensional non-contact measuring machine called ATOS made by GOM Inc or a high-precision X-ray CT scanner manufactured by NIKON for the main spindle. In both cases, the task at hand involves confirming any difference between the model and profiling result for each required part by converting the measured object to a 3D form and superimposing it onto the 3D model and before doing so, we identify the most crucial aspects based on the usage information for the customer’s measuring machine, the measurement method and disclosure range and strive to ensure our products are made based on the optimal measurement method. Because this is an important element for stable manufacturing, over and above measured numerical values alone, we ensure close coordination and configuration of measurements for the projects we evaluate.
*Remark : This newsletter was originally published on June 11, 2018
